JWT
VonaJS provides a powerful and flexible JWT capabilities based on jsonwebtoken
App Config
JWT configuration can be modified in the App Config:
src/backend/config/config/config.ts
// modules
config.modules = {
  'a-jwt': {
    tempAuthToken: {
      signOptions: { expiresIn: 5 * 60 },
    },
    base: {
      secret: undefined,
      signOptions: { issuer: env.APP_NAME },
      verifyOptions: { issuer: env.APP_NAME },
    },
    clients: {
      access: {
        signOptions: { expiresIn: 2 * 60 * 60 },
      },
      refresh: {
        signOptions: { expiresIn: 7 * 24 * 60 * 60 },
      },
    },
  },
};| Name | Description |
|---|---|
| tempAuthToken | Configuration for temporary accessToken |
| base | Basic configuration, providing common base settings for all Clients |
| clients | Configures multiple Clients. The system provides built-in access/refresh Clients for generating accessToken/refreshToken |
signOptions: see: jsonwebtoken
Adding a New Client
The following explains the Client configuration by adding a new Client.
1. Adding Type Definition
Add a new Client type definition using the interface merging mechanism, such as test, to generate JWT tokens for testing scenarios.
In the VSCode editor, enter the code snippet recordjwtclient, and the code skeleton will be automatically generated:
declare module 'vona-module-a-jwt' {
  export interface IJwtClientRecord {
    : never;
  }
}Adjust the code, and then add test
declare module 'vona-module-a-jwt' {
  export interface IJwtClientRecord {
+   test: never;
  }
}2. Adding Client Configuration
src/backend/config/config/config.ts
// modules
config.modules = {
  'a-jwt': {
    clients: {
      test: {
        secret: 'xxxx',
        signOptions: { expiresIn: 2 * 60 * 60 },
      },
    },
  },
};secret: Can provide an individualsecretvalue for the Client- If empty, the
base.secretvalue is used - If
base.secretis also empty,this.app.config.server.keys[0]is used
- If empty, the
3. SERVER_KEYS
env/.env
# server

SERVER_KEYS = vona__1596889047267_3245src/backend/config/config/config.ts
// server
config.server = {
  keys: (env.SERVER_KEYS || '').split(','),
};Obtaining JWT Client Instance
class ControllerStudent {
  @Web.get('test')
  async test() {
    const jwtAccess = this.bean.jwt.get('access');
    const jwtRefresh = this.bean.jwt.get('refresh');
    const jwtTest = this.bean.jwt.get('test');
  }
}Generate accessToken
class ControllerStudent {
  @Web.get('test')
  async test() {
    const jwtAccess = this.bean.jwt.get('access');
    const accessToken = await jwtAccess.sign({ userId: '1' });
  }
}Generate JWT Tokens
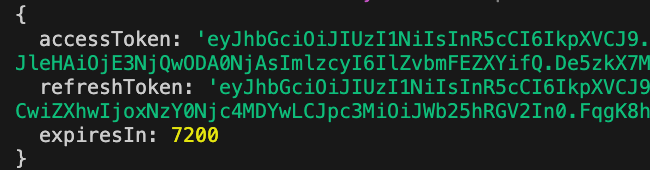
Can generate accessToken/refreshToken at the same time.
class ControllerStudent {
  @Web.get('test')
  async test() {
    const jwtTokens = await this.bean.jwt.create({ userId: '1' });
    console.log(jwtTokens);
  }
}As shown in the figure below:
Generate temporary accessToken
In certain scenarios, an accessToken needs to be used in the URL query. In this case, a temporary accessToken needs to be generated. The expiresIn of a temporary accessToken is shorter than that of a regular accessToken, making it more secure.
There are two ways to generate a temporary accessToken:
Method 1
class ControllerStudent {
  @Web.get('test')
  async test() {
    const jwtAccess = this.bean.jwt.get('access');
    const accessToken = await jwtAccess.sign({ userId: '1' }, { temp: true });
  }
}Method 2
class ControllerStudent {
  @Web.get('test')
  async test() {
    const accessToken = await this.bean.jwt.createTempAuthToken({ userId: '1' });
  }
}JWT Verification
class ControllerStudent {
  @Web.get('test')
  async test() {
    const jwtAccess = this.bean.jwt.get('access');
    const accessToken = await jwtAccess.sign({ userId: '1' });
+   const payload = await jwtAccess.verify(accessToken);
    assert.deepEqual(payload, { userId: '1' });
  }
}